Enrollment is a one-time setup that registers your drag sequences with DragON. Instead of typing a password, you select a Start Tile and an End Tile from a themed image grid to create your unique credential. Multiple drag sequences can be chained for stronger security.
Prerequisites
- A Windows PC with DragON installed
- Your valid Windows username and password (or Microsoft account credentials)
- The dragEnroll.exe application, included with your DragON installation
Step-by-Step Enrollment
Launch the Enrollment Application
Navigate to your DragON installation folder and launch dragEnroll.exe. The enrollment window will appear with a credentials form.
Enter Your Windows Credentials
Fill in your User Name, Domain/Computer Name (auto-populated), and Password. Confirm your password in the Reenter field. If using a Microsoft account, check "I am a Windows Live User." Click Next.

The enrollment credentials form — enter your Windows username and password, then click Next.
Credential Validation
DragON validates your credentials against the system. If correct, you proceed automatically. If validation fails, re-enter your credentials carefully and click Next again.
Select a Theme
Choose a theme for your tile grid. The theme determines the images you will drag during every login.
Landmarks
Eiffel Tower, Taj Mahal, Statue of Liberty…
Animals
Illustrations of animals from around the world
Space
Planets, stars, and galaxies
Ocean
Marine life and ocean imagery
Cartoon
Cartoon characters and illustrations
The tile grid populated with the Landmarks theme — select any theme that appeals to you.
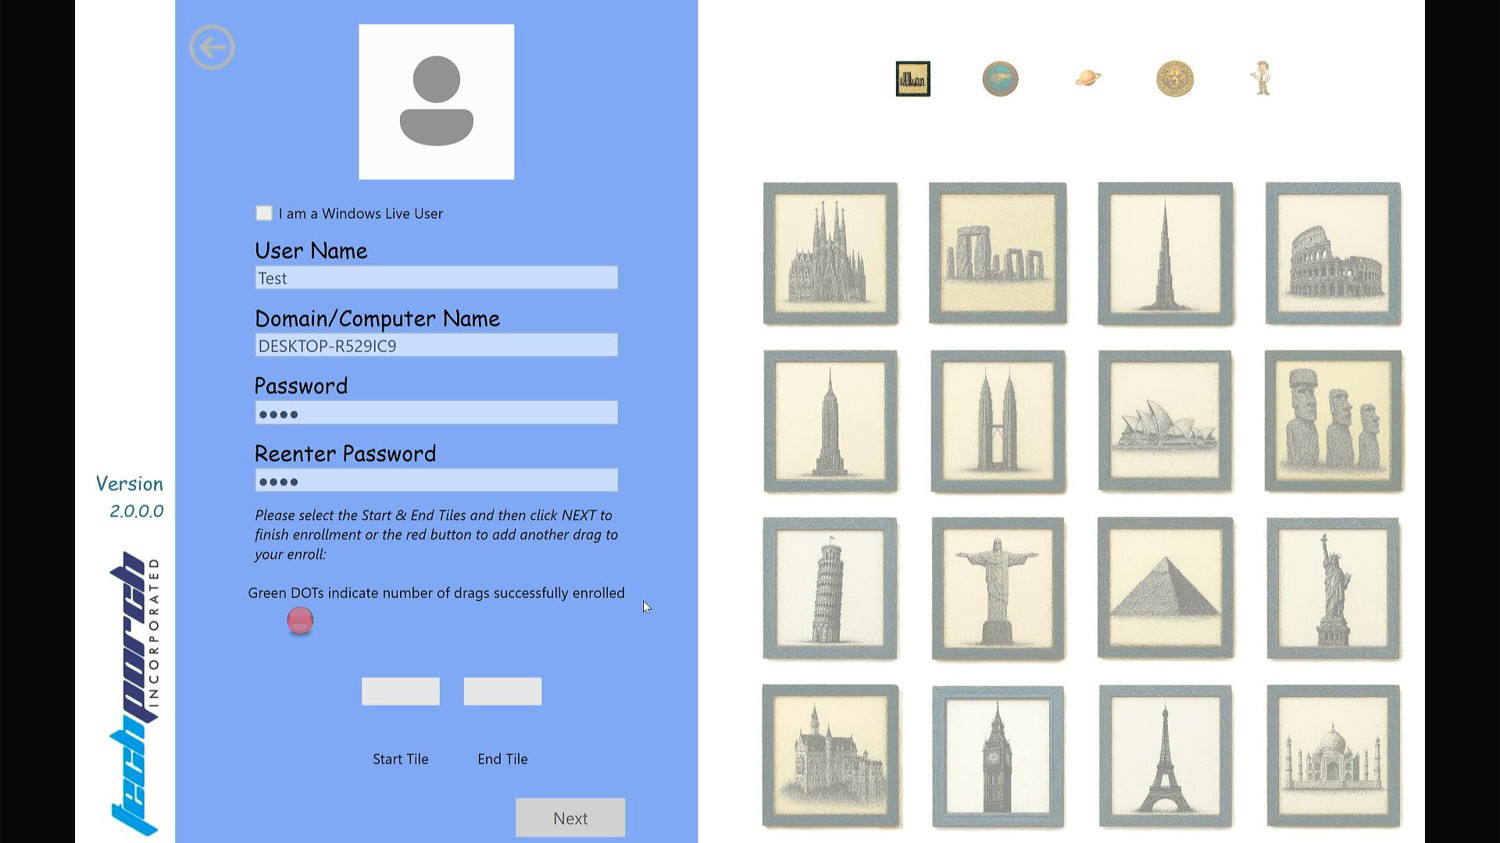
Create Your First Drag Sequence
Click a tile to set your Start Tile — it appears in the Start Tile slot on the left panel. Then click a different tile to set your End Tile.
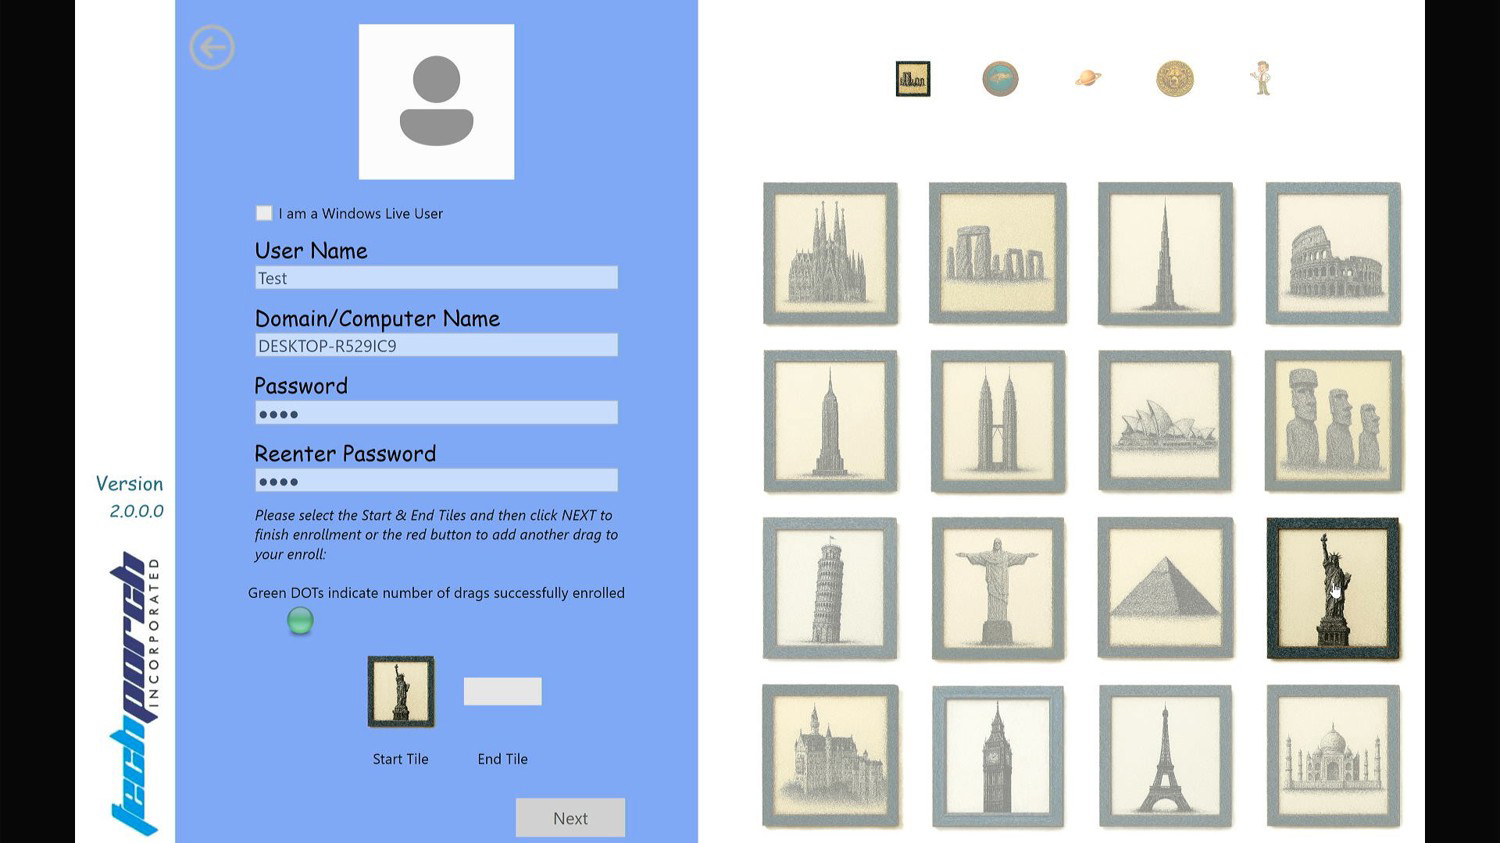
A Start Tile has been selected (shown in the Start Tile slot). The LED turns green once both tiles are chosen.
Understanding the LED Indicators
Once both Start and End tiles are selected, the RED LED turns GREEN confirming that sequence is complete.
Add Additional Drag Sequences (Optional)
For stronger security, click the next RED LED to begin a second sequence. Select new Start and End tiles. Repeat for as many sequences as you want, then click Next.
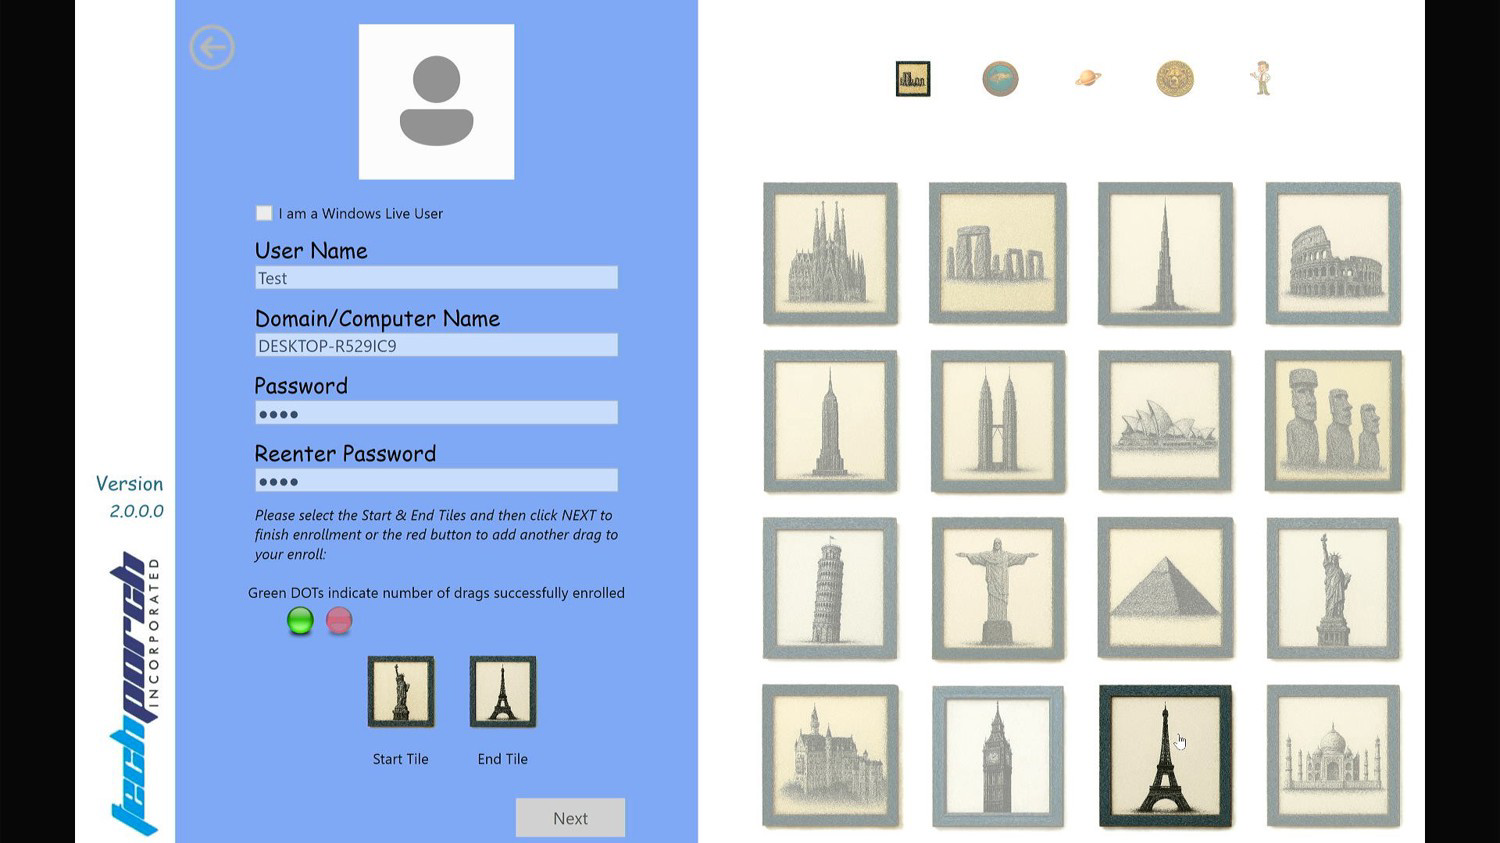
Two green LEDs and one red LED — two sequences are complete, a third is being set up.
Verify Your Drag Sequences
Perform each drag sequence (Start Tile → End Tile) in the same order you created them. If you select the wrong tile, restart from the first sequence. There is no time limit.
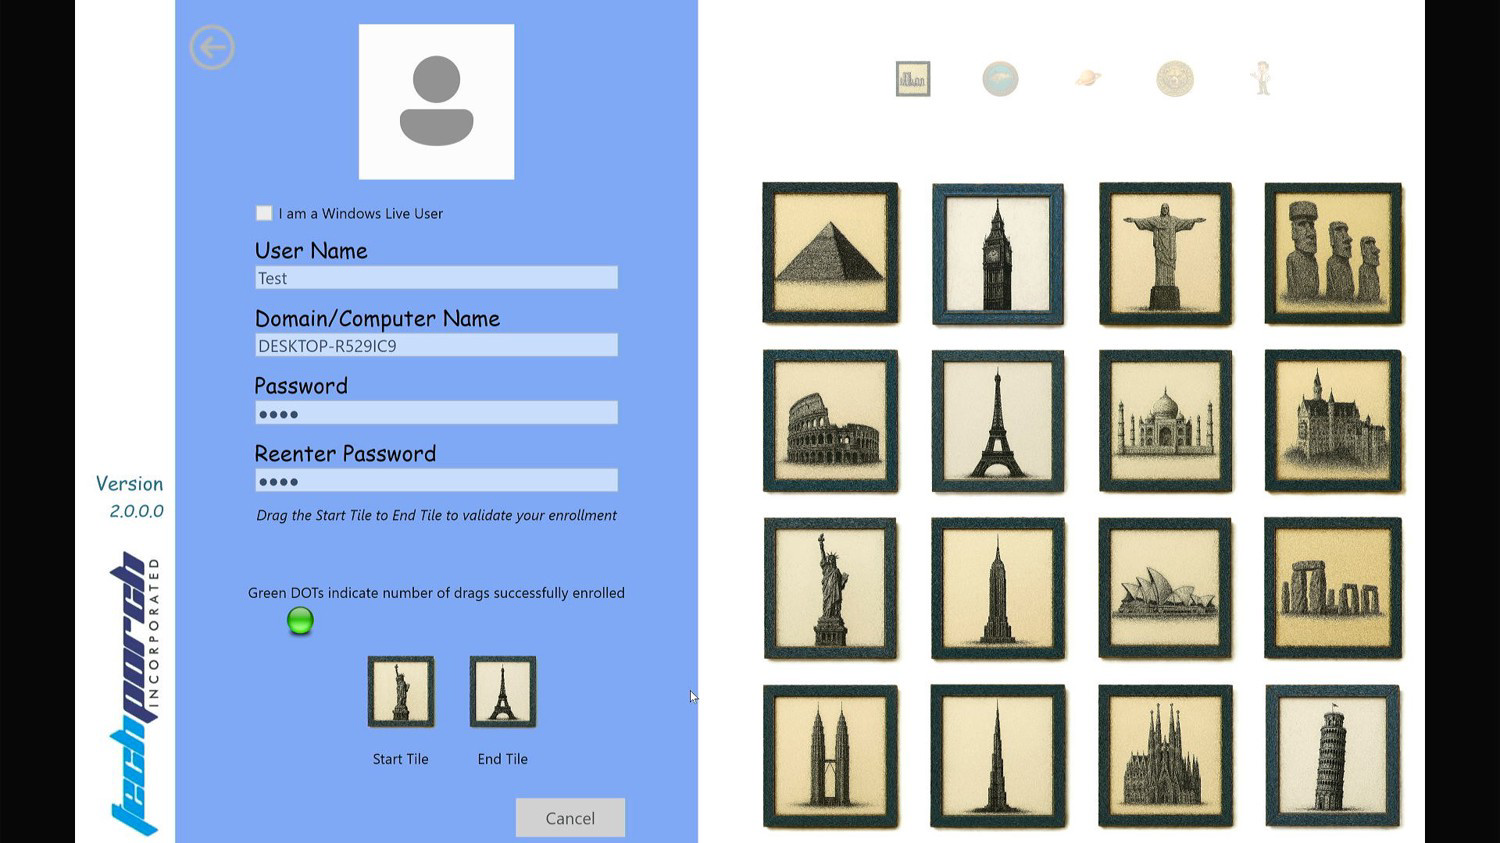
The verification screen — drag from your Start Tile to your End Tile to confirm each sequence.
Complete Enrollment
Once all sequences are verified, a confirmation screen appears. Click Done to save your enrollment. You can now use DragON to log in to Windows.
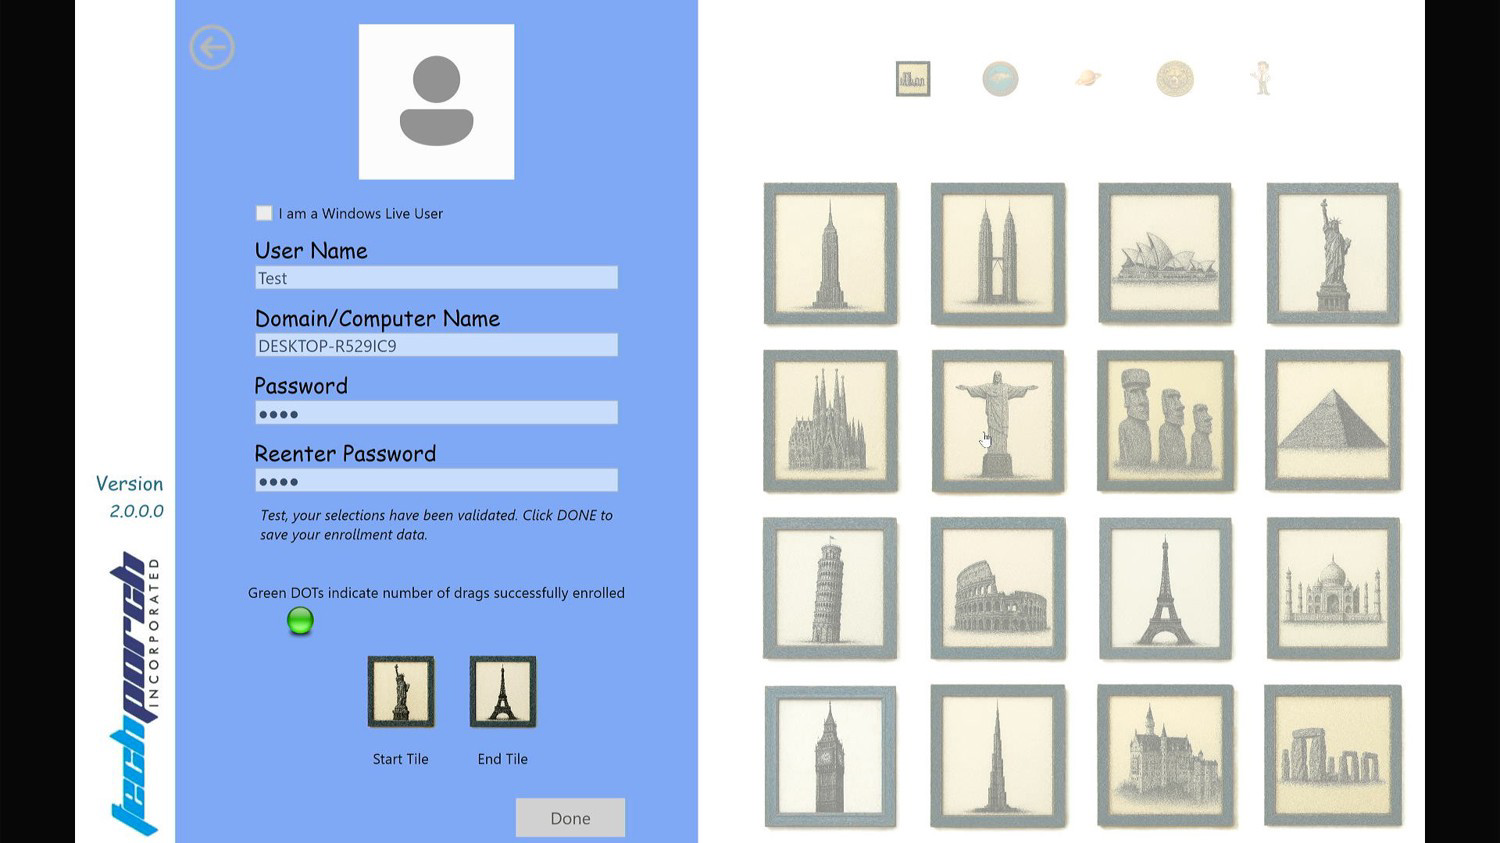
Enrollment complete — click Done to save your settings and start using DragON.
Troubleshooting
Can't find what you're looking for?
Contact Support